Week Twelve – The Middle Kingdom of Egypt

Week Twelve was relatively lite as we were focusing on Egypt’s Middle Kingdom, so we tried to focus on the lives of everyday Egyptians.

Story of the World:

Listened to Egypt Invades Nubia and The Hyksos Invade Egypt and completed the review questions and narration exercise. M1 completed the Hyksos drawing page and the Middle Kingdom map page.

Hyksos Jewelry.jpg

Read Together:


The Usborne Encyclopedia of Ancient Egypt, pages 20 to 21 for the history of the Middle Kingdom. We also read pages 74 to 96, which focuses the lives of everyday Egyptians, because it was a relatively light week.

Watch Together:

Rewatched Crash Course’s Ancient Egypt: Crash Course in World History, which discusses the invasion of Egypt by the Hyksos. 

Listen Together:

For older students, The Maritime History podcast has a 27 minute overview of Middle Egypt, with a focus on an explorer named Hannu who opened up trade routes and includes a narrative on the Tale of the Shipwrecked Sailor.


Teaching Dia de los Muertos

While we were living in England, we often found ourselves providing input into British friends about Halloween. Although many American customs originated in the British Isles, many have been forgotten or transitioned to Bonfire Night ceremonies. We therefore made it a priority to keep the traditions of Halloween alive in our house. Arriving back in the United States, our kids were all ready to carve pumpkins, dress up in costume, and trick-or-treat. But along with all of the Halloween decorations in our local stores, we saw items like sugar skulls, which peaked my girls interest to find out more about Mexican and Central American celebration of the Dia de los Muertos (Day of the Dead).

Dia de los Muertos is a multi-day festival focusing on the gathering of friends and family to remember loved ones who have passed away and to support their spiritual journey. The festival generally starts on October 31, when ofrendas are made and taken to the graves of children  (1 November, Dia de los Inocentes) or adults (2 November, Dia de los Muertos). The graves of the dead are cleaned and decorated with the ofrendas, which contain pictures of the deceased, and their favorite foods or drinks.

Ofrendas:

Ofrendas (alters) are an important part of the celebration of Dia de los Muertos. Families will visit the graves of loved ones where they would be cleaned and decorated. These ofrendas usually take the form of marigolds, small toys, bottles of alcohol for adults, candy (especially candy skulls) and dead bread. Students can make small ofrendas to be taken to the graves of family or placed on nature tables at home. To make a homemade ofrenda, you will need clear plastic hinged baseball card holders, decorative paper (cardstock is best), plastic jewels, glue, and pens or markers. There really is no wrong way to decorate the box, but we generally cut and glue paper to the inside of the box. Children can then write messages or draw pictures to be left inside.

Tissue Paper Marigolds: 

Marigolds (cempasuchils) are the traditional flower for honoring the dead. To make tissue paper Marigolds, you will need tissue paper (golds, yellows, reds and oranges), green pipe cleaners, scissors, and a vase to arrange your flowers. To make your marigolds:

  • Step 1: Lay three full pieces of tissue paper on top of each other.
  • Step 2: Fold the pieces of paper together about every inch so that the folded paper resembles a fan. You will need to fold 1″, then flip the paper over and fold 1″ again. Continue doing this until you have folded up all the paper.
  • Step 3:  Fold your flowers in half and then loop 1.5″ of a green pipe cleaner around the paper to form a stem and twist.
  • Step 4: Depending on how large you want your flower to be, you can either choose to cut your into half or thirds.
  • Step 5: Trim the edges of the flower, generally you can round them, but you can also get creative if you feel like it like when you make a Valentine.
  • Step 5: Holding the pipe cleaner, gently open up the paper one sheet at a time, starting with the top layer. Be careful not to rip the paper. Slowly separate the middle layer and pull up toward the center. Pull the bottom layer down.


Movies: 

Really the short film that got my kids interested in Dia de los Muertos was a short film on Youtube by Whoo Kazoo on the festival. The short really hits a number of the traditions practiced during the festival. Another great movie is the 2014 film The Book of Life, where the protagonist (a bullfighter) sets off on a journey on Dia de los Muertos to fulfill the expectations of his family.

Antietam National Battlefield

The Battle of Antietam (or Sharpsburg) was fought in September of 1862 and was the culmination of Robert E. Lee’s Maryland Campaign. The park was one of the first battlefields to be preserved in the late 1890s and transferred to the Department of the Interior in the 1930s. While small in scope, the park is famous for the many locations made famous by the battle to include the Dunker Church, Miller’s Cornfield, the Bloody Lane, and Burnside’s Bridge. But in addition to the battle, Antietam also provides an opportunity to teach students about Civil War medicine (with a focus on Clara Barton) and President Lincoln’s Emancipation Proclamation.

img_4662

The Battle:

By the end of the summer of 1862, Confederate General Robert E. Lee and the Army of Northern Virginia had defeated three separate Union Armies and was moving through western Maryland in an attempt to insight rebellion amongst the state’s residents and gain favor with the governments of Britain in France. Crossing at Cheek and White’s Ford, Lee split his army in two, sending one wing to Harper’s Ferry and the other to Frederick.

To reinvigorate the Union Army President Abraham Lincoln reinstated General George McClellan to command of the Union Army in the Eastern theater. Moving slowly, McClellan was able to catch up with Lee west of Frederick and fight a pitched battle at the three gaps (Fox’s, Turner’s and Crampton’s) of South Mountain. After being driven from the gaps, Lee arranged his army in a defensive perimeter around the the town of Sharpsburg, Maryland. McClellan would cross a large portion of his army across Antietam Creek in anticipation of the battle to come the following day.

The action at Antietam started early on the north side of the battlefield at the Cornfield, where elements of Union General Joseph Hooker’s Corps assaulted the Confederate left. Attacks and counter-attacks raged in Miller’s Cornfield and the Dunker Church throughout the early morning as both sides committed troops to take advantage of the situation. By noon, the course of the battle shifted to a Sunken Road, where Union troops continually threw fresh troops against a strong position that would take on the name “Bloody Lane”. Eventually, Union forces were able to pierce the Confederate flank and drive the defenders off, only to be stymied by concentrated artillery. By the early afternoon, the battle shifted to the Confederate anchored by a few hundred men along Antietam Creek. For several hours, the Confederates prevented  Burnside’s Corps from crossing the Creek via what would be later known as Burnside’s Bridge, until a pair of Union regiments successfully charged the position. Shortly after, the arrival of Confederate reinforcements from Harper’s Ferry halted the Union advance and allowed Lee to consolidate his army. The Battle of Antietam would eventually result in a stalemate with Lee returning to Virginia and McClellan being relieved of command. More importantly, the battle provided President Lincoln with the impetus to draft the Emancipation Proclamation which called for the end of slavery in those states currently in rebellion.

Visiting the Battlefield:

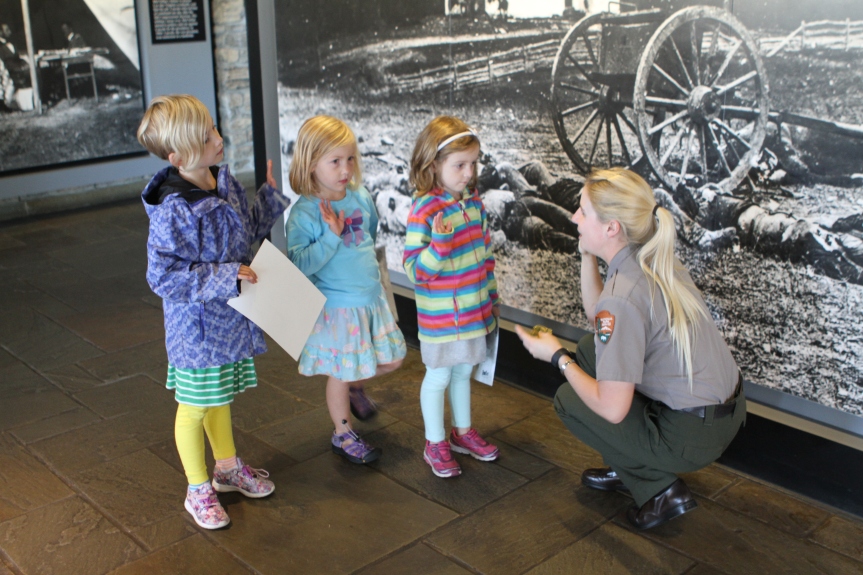
Antietam is actually quite a compact battlefield and can be toured either by car or on foot. The Visitor’s Center contains a small museum dedicated to the battle and a 30 minute video. Twenty minute Ranger led discussions occur in the Observation Room, which provides a enclosed space for visitors to observe the breadth of the park. Local re-enactors also provide a demonstration on the firing of Civil War cannon. Antietam also hosts a Junior Ranger Program for children aged 5 to 13. I would also recommend the park’s annual Illumination, which occurs the first weekend in December.

img_4664

To see most of the battlefield by foot, I would recommend the following four trails:

  • Antietam RememberedWest Woods Trails – The loop begins at the Antietam Visitor Center and loops down to the Dunker Church. From there, hikers can pickup the West Woods Trail. The Woods were the scene of bloody fighting by Sedgewick’s Union Division. You can then complete the loop and return to the Visitor’s Center or join the Cornfield Trail near Stop 5 (The Rock Ledge) to extend the loop.
  • Cornfield Trail – The Cornfield Loop is 1.6 miles long and takes visitors through the early morning portion of the battlefield to include the North and East Woods, the Miller and Poffenberg Farms, and the Cornfield.
  • Bloody Lane Trail – The Bloody Lane Trail starts and ends at the Visitor Center and takes hikers past the Mumma and Roulette Farms. Visitors will then scale the rolling hills up to the Bloody Lane and down the Sunken Road before returning.
  • Final Attack Trail – Linked to the parking lot near Burnside’s Bridge, the trail takes visitors on the undulating terrain east of Sharpsburg where Burnside met the final line of Lee’s Defense. Visitors should also walk down to the bridge itself (when construction is over) to cross over the other side and observe the heights defended by the Confederates.

Civil War Trust Resources:

The Civil War Trust has a ton of resources on the Antietam Campaign. There is a battle app, which provides insight into the different phases of the battle beyond what the National Park Service provides. Prior to leaving for the battlefield, I would recommend that students watch the Trust’s Animated Map, which provides a visual of the battle combined with reenactment video.

Books:

There are a surprising number of books for young children about Antietam. To get young children into the battle, I would recommend The Battle of Antietam: The Bloodiest Day of Battle, by Larry Hama, which is a graphic novel of the Antietam Campaign. Because  of Clara Barton’s connection to the battle, I would also recommend picking up one of the many young reader biographies for the Angle of the Battlefield. Magic Treehouse’s Civil War on Sunday also features Jack and Annie traveling back in time to meet Barton. Finally, Amazon.com also has a kid’s introduction to the Emancipation Proclamation from Ian D. Fraser.

For older students and adults, I would recommend the following texts:

  • Crossroads of Freedom: Antietam by James M. McPherson – McPherson’s work focuses more on the stakes of the battle and the eventual diplomatic outcome, when Great Britain removed its tacit support to the Confederacy. At 215 pages, Crossroads of Freedom provides a great overview of the battle.
  • Landscape Turned Red: The Battle of Antietam by Stephen W. Sears – Probably my favorite Antietam work. Landscape Turned Red provides a blow-by-blow account of the battle and is very representative of Sears’ style to engage the reader.
  • The Maryland Campaign Volumes I to III by Thomas G. Clemens & Ezra A. Carman – This really is the definitive work on the Maryland Campaign and the Battle of Antietam. For those wanting to dive into the width and breadth of the campaign and have the time to read over 1,500 pages. The volumes are available in both hardback and Kindle versions.
  • The Maps of Antietam by Bradley M. Gottfried – My father in law and a great friend have both purchased this book and I am glad that I have been able to reference it on our visits. The book is filled with almost up to the minute maps showing the movements of the armies as back and forth of the battle took place.

Website: Antietam National Battlefield

Know Before You Go: The short trail from the Visitor’s Center to the Dunker Church is well maintained, while others are across uneven dirt paths. Bathrooms are located at the Visitor Center, but at no other locations around the battlefield. Food options at the Visitor’s Center are limited to a few small snacks and water. There are a number of taverns and small restaurants in town, but if your kids have been extra good, I would recommend Nutter’s Ice Cream at 100 East Main Street.

Location: Sharpsburg, Maryland.

Hours: The Visitor Center is open daily from 9AM to 5PM daily, except on Thanksgiving, Christmas, and New Years Day. The battlefield is op

Admission: Admission is $10 and covers one vehicle.

The Walters Art Museum – Ancient Egypt & Nubia

Even though we live close to Washington, DC and the Smithsonian, it isn’t always possible to take the kids down to peruse the various museums along the National Mall. This is why Baltimore’s Walters Art Museum is a great resource for home school families trying to teach ancient civilizations. Although the purpose of our trip was to focus on Egyptian artifacts, the museum has collections from Greece, Rome, and the Ancient Near East.

The museum’s Ancient Egypt & Nubia exhibit provides a fantastic overview of Egyptian history from the Old to the New Kingdoms. By far the most impressive pieces are the two monumental statues of the lion-headed goddess Sekhmet that welcome you and the intact mummy, which is still in its wrappings. Both of my older girls have previously been to the British Museum and been able to see the vast highlights of their collection. But with the Walter’s both M1 and M2 were happy to walk around and see the smaller pieces that shaped the lives of those in ancient Egypt whether it was in this life or the next. Of particular note were the canopic jars, shabtis, senet boards, and a duck cosmetics holder. The Egyptian collection also offers a small number of interactive exhibits to include an overview of the process of mummification, which is also available online.

Website: Walters Museum of Art – Ancient Egypt and Nubia Collection

Know Before You Go: Those with disabilities should from the Centre Street entrance. On street parking is available, with a larger garage at the intersection of Cathedral and Centre street.

Location: The Museum is located at 600 North Charles Street, Baltimore, Maryland.

Hours: The museum is open from Wednesday to Sunday from 10AM to 5PM, although it is open late until 9PM on Thursdays. The museum is closed on Monday and Tuesday, as well as Martin Luther King Day (observed), Independence Day, Thanksgiving, Christmas Eve and Christmas.

Admission: Admission is free.

George Washington’s Birthplace National Memorial

On our way home from a recent camping trip to Fredericksburg, I made sure that stopped at the George Washington’s Birthplace National Memorial. Unlike his homes at Ferry Farm or Mount Vernon, which contributed to the lore of Washington, the birthplace site at Pope’s Creek serves as gateway to understanding the world he grew up in. The settlers of Tidewater Virginia developed a unique society reliant upon riverine transportation to ferry crops and handmade goods out and imported goods from England in. Slaves would have worked among large fields of tobacco and corn in between forests. The plantations along the Chesapeake Bay would become the homes of a new landed gentry perpetuating itself through intermarriage, slavery, and civil service.

The site at Pope’s Creek was originally settled by George Washington’s great-grandfather in 1657. The Washington family’s expansion. Built before 1718, the original house was expanded throughout the 18th century by George Washington’s father Augustine into a ten-room house known as “Wakefield”. Washington was born at Pope’s Creek on 22 February 1732, according to the Gregorian calendar. Washington and his family would later move to Home Farm or Ferry Farm south of Fredericksburg in 1738. A fire and flood on Christmas Day, 1779 would unfortunately destroy the house and it would never be rebuilt. Outside the Memorial House is a chalk outline defining the footprint of the original house.

george_washington27s_birthplace_281856_engraving29
“Harper’s New Monthly Magazine” Vol. XII, No. LXIX, February, 1856, p. 291. New York: Harper & Brothers

In the 1920s, the Wakefield National Memorial Association was formed in restore the property. Before the 200th anniversary of Washington’s birth, the Memorial Association constructed the brick Memorial House, which is a replica of a typical upper-class house of the period. The bottom floor contains a dining, drawing and bedrooms with period furniture (none belonging to the Washingtons). The upper floors contains four bedrooms, with the children’s room of particular interest to young visitors.

20161113_131327

The best part of the National Memorial is actually walking the grounds and visiting the out buildings. The grounds contain a kitchen house, a Colonial Herb and Flower Garden, a blacksmith shop, and various farm buildings to include tobacco barn, pig styes, horse barns and chicken coops. The livestock, poultry and crops are heirloom 18th century varieties and 18th century farming methods used on the working farm.

The Visitor Center is simple with a smattering of artifacts recovered from the original house site. A fourteen minute video runs frequently outlining the history of the Washington family. Other sites around the park include the 1896 Memorial Obelisk, the Family Burying Ground, and a mile-long nature trail.


The Memorial has a great junior ranger program that is geared towards younger students. Instead of focusing exclusively on Washington’s life, the program is rooted more in the life on a plantation in the early 18th Century. Unfortunately, short shrift is paid to the role that slaves played in the development of the plantation.

20161113_144720

Website: George Washington Birthplace National Monument

Know Before You Go: The grounds are well maintained and accessible along gravel paths. Access to the house is via a set of stairs without a ramp. Bathrooms are located at the Visitor Center, near the Memorial House and near the picnic ground.

Location: Washington’s Birthplace is located at 1732 Popes Creek Road in Colonial Beach, Virginia 22443.

Hours: The Visitor Center and Historic Area is open daily from 9AM to 5PM daily, except on Thanksgiving, Christmas, and New Years Day.

Admission: Admission is free.

Week Five – The First Sumerian Dictator

This week focused primarily on Sumer and the rise of Sargon who attempted to conquer the various city-states within Mesopotamia.

Story of the World:

Listened to The First Sumerian Dictator and completed the review questions and narration exercise. M1 and M2 completed the Sargon drawing page and M1 did the Sumer word jumble.

Read Together:

Unlike Ancient Egypt, Sumer doesn’t have a lot going for it with regard to children’s literature. So, we relied on SotW to provide some recommendations. Within their lesson plan were:

The Golden Sandal (A Middle Eastern Cinderella Story), by Rebecca Hickock. Both M1 and M2 enjoyed reading this book and instantly picked up the themes from the Cinderella story. This story is actually based on the Iraqi folktale of The Little Red Fish and the Golden Clog, but doesn’t necessarily take place during the time of Ancient Sumer. The illustrations are great and the morals are a bit stronger than the Disneyfied version.

The Three Princes: A Tale From the Middle East, by Eric Kimmel. I read this to M1 and I saw her pick it up a few more times on her own to read. She indicated that she really liked the bold colors in the story, especially those of the garments worn by the Three Princes. The story is actually based on a folktale from Africa called The Search, which leaves the reader with an open-ended conclusion to the story. Three Princes on the other hand has a firm conclusion, highlighting the selflessness of one of the Princes.

The Usborne Encyclopedia of World History, pages 110 to 113 focus on the development of Mesopotamia from the development of cities to the flourishing of maritime trade and the rise of Sargon.

Watch Together:

We watched Crash Course in History’s Mesopotamia episode on Youtube on three occasions. Because Sumer was one of the first locations to develop pottery and the potter’s wheel, we watched several videos on making clay pots. Most focus on making pottery using electric potters wheels, so we really enjoyed this one, which was human driven.

Listen Together:

Although probably geared towards older students, I recently came upon a podcast focused on Maritime History. The first three episodes provide a great overview of the history of maritime trade, which flourished in Mesopotamia. Trade in Sumer was extremely important as the region contained little in natural resources to include metal or strong wood, but was rich in grain, wool, finished metal objects and pots. Boating through Mesopotamia’s canals and rivers brought about the first world trade. The Maritime History Podcast episodes I would recommend are:

Additionally, I would recommend listening to the BBC’s History of the World in 100 Objects podcast on The Standard of Ur.


Poe’s Baltimore

img_4713

The Simpsons as a television show ranks fairly high in our house. I have always been wondering the right time to introduce the show to our daughters, because it is such a cultural touchstone. So last year I decided to allow them to see some of the Treehouse of Horror episodes. To gauge their interest, I showed them Lisa Simpson’s reading of The Raven and they were immediately hooked. Since then, I have used October as an opportunity to introduce them to Poe’s poems and short stories. The Raven has played

With Halloween fast approaching, it was the perfect time to introduce our girls Edgar Allan Poe’s Baltimore. Our first stop was the Poe House, which was built in 1830 at what was the edge of Baltimore. By 1832, Maria Clemm, her mother Elizabeth Cairnes Poe, and daughter Virginia Eliza Clemm moved from East Baltimore to the house.Accompanying Maria, Elizabeth and Virginia was a 23 year old Edgar Allan Poe. Edgar, who had recently released his third volume of poems, entitled Poems, was attempting start his career as a writer. In 1833, Poe was awarded a prize in October 1833 for his short story Ms. Found in a Bottle and introduced to Thomas W. White, editor of the Southern Literary Messenger. Poe only lived in the Baltimore house until 1835 when he moved to Richmond where he became White’s assistant editor. He returned in 1836 to marry his cousin Virginia Eliza, before returning to Richmond.

The house is quite small and can be visited in about 30 minutes, through a self-guided tour. Along the way, are displays outlining Poe’s life and death in Baltimore, the short-stories that he wrote while in Baltimore, and the genealogy of the Poe family. Poe artifacts inside the house include the author’s writing desk and telescope, while the attic contains a simple bedroom that was Poe’s. There is also a gift shop with tons of Poe related memorabilia.

Our second stop was the Westminster Burying Grounds, where Edgar, Virginia and Maria are buried. The grave is right near the entrance and features several display plaques. In addition to the Poe grave, Westminster Burying Grounds a number of famous Marylanders are interred at the site. These include James McHenry (signer of the U.S. Constitution and namesake of Fort McHenry), Robert Smith (Secretary of State and the Navy, and Attorney General), and Samuel Smith (militia commander during the 1814 Battle of Baltimore). The burying grounds are open to the public during daylight hours from 8 AM till dusk and are free of charge.

Website: The Poe in Baltimore website has a number of great recommendations for alternate locations linked to Poe throughout Baltimore.

Know Before You Go: Like many homes built in the 19th Century, the Poe House in Baltimore is very small and cramped. Visitors should take care on the steep stairs to the second floor and the attic.

Location: The Poe House is located at 203 North Amity Street in Baltimore, Maryland. The best way to get to the house is via car, where there is plenty of parking.

Hours: The Poe House is open on Fridays, Saturdays and Sundays from 11 AM to 4PM through the end of December. There is a special opening on Halloween.

Admission: Admission is $5 for adults and $4 for seniors, active duty military and students with IDs. Children under 12 are admitted free with an adult.


Week Four Review – The Old Kingdom of Egypt

We recently had some guests visit us in Maryland, so the last two weeks have been combined to focus on the Old Kingdom of Egypt. This also gave us some time to focus on our project, which was making a mummy.

Story of the World:

This chapter from Story of the World was broken up into two narration activities, Making Mummies and Egyptian Pyramids. M1 answered the review questions for both components.

Projects:

I should note that we actually did a lot of work on Ancient Egypt, Greece and Rome last for the 2015/2016 school term when we were living in England. Thankfully a lot of their work made it onto the boat back to Maryland, so we were able to review what we had done last year.

Project 1: Mix and Match the Pyramid Type

I had M1 cut our pre-printed photographs of a Mastaba, Djoser’s Step Pyramid, the Bent Pyramid, and the True Pyramids at Giza. We then arranged them on a historical timeline to illustrate the development of pyramids from Old Kingdom.pryramid-match

Project 2: Outfitting Your Own Tomb

We discussed some of the items that Egyptian Kings and Queens were buried with so that they could then be used in the afterlife. Using catalogs and old magazines or free drawing, I had M1 design a tomb for herself with the things she would want to take with her as an Egyptian queen.

outfit-your-own-tomb

Project 3: Making Scented Oils

This project was designed to mimic the types of oils Egyptians used on a daily basis and when preparing the dead for mummification. A good recipe can be found here, although you can replace patchouli with lavender.

Project 4: Make a Mummy

We have done this project twice now, and it really is a lot of fun, although your results can be mixed. Story of the World recommends using a whole chicken, to include the giblets. To avoid issues with salmonella, we have chosen to stick with apples and eggplants as our mummification medium. To make a mummy you will need:

  • enough natron salt (50/50 mixture of salt and baking soda) to cover your mummy
  • apple
  • linen or gauze bandages
  • essential oil from above
  • white glue
  • water
  • small paint brush

To start, cut your apple into a mummy. Better yet, you can use a gingerbread cookie cutter to cut your apple to look like a person. With the apple, we were able to have the girls dig out the seeds (to represent the internal organs). We then covered the apple on the top and bottom with natron salt. Leave to sit for 7 to 10 days. As control, we out a similar piece of apple to show the decaying process.

After about ten days, break open the natron mixture and retrieve the apple. Dust the salt off the apple using a damp cloth, but then pat the apple dry. Use the scented oil to coat the apple. Then tear the linen into 1-inch strips. Mix white glue and water (1–2 parts water to 1 part glue). Dip the strips of linen into the glue, then begin wrapping. Wrap the wings and legs separately from the body. Once that is complete, wrap the body. It should be wrapped in at least 2–3 layers. If you like, wrap a few amulets into the mummy like the Egyptians did. Let it dry completely. You can then use salt dough, clay or a small shoe box to build a sarcophagus for your mummy.

Read Aloud:

For the Old Kingdom, we read pages 18 to 19 and pages 60 to 67 of Usborne’s Encyclopedia of Ancient Egypt. The first section goes into the history of the Old Kingdom, while the second section goes into depth on embalming and mummification, then the Pyramid structures at Giza. You can also read pages 116 to 117 of the Usborne Encyclopedia of World History. M1 also re-read The Magic Tree House: Mummies in the Morning by Susan Pope.

Listen and Watch Aloud:

There are a ton of great audio resources on the embalming and mummification process. The ladies at Stuff You Missed in History Class has a podcast on Embalming and Mummification Rituals of Ancient Egypt. The Getty Museum’s video on mummification also provides a simple three minute introduction to the process. The BBC’s A History of the World in 100 Objects also opens their series with a piece on the Mummy of Hornedjitef.

On burial architecture, there are an equal number of audio resources. To start, there is Stuff You Missed in History Class’ Djoser and Egypt’s First Pyramid, which goes into the history of Egypt’s development of pyramids from mastabas. There are a number of short histories on the development of pyramids, but if you children can sit through longer documentaries, I would recommend those from the Discovery and History Channels.

Passport to Your National Parks

When my wife and I were stationed in Hawaii in 2008, we took a long weekend to travel to Maui and visit Haleakala National Park. After driving the 10,000 foot ascent to the top of Pu’u’ula’ula Summit, we were disappointed to find that the crater was almost entirely socked in by cloud and fog. Through our camera lens, we could barely pick out the features below us from multiple vantage points. Sad that we would not have some great photographs to record our trip, I recommended that my wife purchase a National Park Passport that she could get a cancellation stamp. I mentioned that my family had a Passport book since the late 1980s and I hadn’t brought mine along as I already had a stamp from Haleakala. Totally expecting my wife deride me for the nerd that I am, I was pleasantly surprised when she told geeked out over the concept and purchased her own.

As much of our travel with our children has occurred internationally, we have not had the chance to visit many of our National Parks. Moving back to Maryland this summer changed all that and both M1 and M2 picked up Centennial copies of the National Park Passport. Following a rather adventurous day on the National Mall, we found that the potential for running out of stamping space, so we also purchased the Passport to Your National Parks Collectors Edition.

How it Works:

The passport is broken up into geographic regions with each region given a corresponding color. The map of each region provides a generalized location of all National Park sites and a text listing for all of the sites based on state and alphabetical order. The following pages provide enough space for 20 cancellation stamps. Stamps locations can be found at the visitor center of each park, generally near the admission desk or in the gift shop. Included on each page is a section where visitors can place full-color image stamps of a particular park. These image stamps are often sold in yearly sets with one national and nine regional stamps.

The one downside is that the smaller passports can fill up quickly if you are gung-ho about visiting lots of National Parks. This is the benefit of the Collector’s Edition, as there is room for all of the sites recognized as National Park locations with a description of the park. At the end of each region there are also spots for additional cancellations that can provide space for special stamps like the Park Service Centennial Special Stamps, site-specific stamps for a particular location in a park, or if you wanted to include stamps from states that have a state park stamp program.

Why They are Great!!!:

The Passports are a great way to build on a student’s knowledge of geography and inspire a love of travel. When I was younger, my family would give me a tentative location that we would be traveling to on our vacation that year. I would then sit down and page through my Passport (pre-Internet) to see what sites were nearby. The passport gave me a chance to have my input into helping plan the trip. Plus, they are just a fun reminder of when you visited a site, with a unique memento.

Fort McHenry – Battle of Baltimore

Fort McHenry National Monument and Historic Shrine in Baltimore Harbor, sits among some of the most hallowed ground in America. Although not notable for the loss of life (only four defenders were killed) like Gettysburg or Pearl Harbor, it is far more famous because what its defense inspired among a still very adolescent nation.

The action at Fort McHenry was part of a much larger Battle for Baltimore that occurred in mid-September 1814. Following the Battle of Bladensburg and subsequent burning of Washington, Maj. General Robert Ross and Vice Admiral Alexander Cochrane’s invasion fleet moved further up Chesapeake Bay to attack the city of Baltimore. On September 12th, Ross landed the main British army at North Point and was met by an advance guard of American soldiers and militiamen along the North Point Road. In a sharp action that day Ross was killed, but the British carried the field, forcing the Americans back to the defenses protecting Baltimore. Prior to the larger attack on Baltimore, Col. Arthur Brook took command of the British ground forces and marched within two miles of the city.

To augment the ground campaign, an attack by the British Navy was necessary. What stood in the way was Fort McHenry and a number of smaller works protecting the entrance to the harbor. The British bombardment of Fort McHenry commenced early on 13 September and lasted some 25 hours. Maj. George Armistead, the fort’s commanding officer, estimated that somewhere between 1,500 and 1,800 shells and rockets were fired by the fleet. Because of the types of weapons used by the British, the bombardment fleet could sit well outside of the effective range of the fort’s guns. A sortie of British landing craft were sent under the cover of darkness to attack Fort McHenry, but they were driven back by a combination of American guns, defective barges and poor reconnaissance.

The bombardment continued throughout the early morning until 7AM on September 14, when the British fleet departed. Aboard a truce ship in the harbor was a Washington lawyer named Francis Scott Key who was seeking the release of a friend captured at the Battle of Bladensburg. Key was able to view the hoisting of the Fort’s garrison flag in the morning light. This inspired him to write a poem entitled “Defence of Fort McHenry,” which was published three days later and soon set to the tune of “To Anacreon in Heave.” Later, the poem and tune would become the America’s National Anthem.

Much like other fortifications along America’s East Coast, Fort McHenry has undergone significant changes in its history. The 1814 Upper and Lower Water Batteries have been moved closer to the Fort and bristle with Civil War-era Rodman canons. A reconstructed Water Battery does provide some insight into the outer defenses of the fort. The Sally Port has been strengthened with a brick guardhouse instead of the wooden walkway extending that extended to the ravelin. At the time of the bombardment, the barracks were only one-story and not the two-story structures that you see today.

Some of the places of interest throughout the National Monument include:

  • Visitor’s Center: The visitor’s center has been recently renovated and incorporates a number hands-on activities for children. Kids can compare their heights to the size of Star Spangled Banner, find their favorite version of the National Anthem, examine a reproduction of a Congreve Rocket, learn about some of defenders of the Fort, and follow the history of Francis Scott Key. The highlight is a ten minute video (shown on the hour and at half past) on the Battle and the authoring of National Anthem.
  • Shore Battery Reconstruction: Although many of the cannon at Fort McHenry are from the period of the Civil War, the reconstructed shore battery provides a glimpse into the types of cannons used to defend against the British Navy.
  • 1814 Barracks: One of the primary stops for the Junior Ranger badge is the 1814 Barracks, which houses displays on the history of the fort through the ages, a multimedia overview of the Battle of Baltimore, and a reproduction of the living quarters for the common soldier defending the fort. Unfortunately, only tables and bunks populate the barracks.
  • Powder Magazine: Although enlarged after the battle, the powder magazine is stocked with powder barrels. Outside there are a number of canons that children can view.
  • Commanding Officer’s Quarters and Guardhouse: The Officer’s Quarters features a mock-up of Maj. George Armistead’s quarters, with an electronic map focusing on the Battle of Baltimore. Visitors then move through the barracks where they can view a presentation on the making and history of the Star Spangled Banner after the battle. Before exiting, you are taken past the guardhouse, where a reproduction of the flag is stored.

Junior Ranger:

Both M1 and M2 took part in the Fort’s Junior Ranger program, which is for 5 to 13 year old students. The Fort McHenry Activity Booklet is broken up into easy, medium and difficult program. We decided to go with the easy portion, which is still pretty difficult and may require the assistance of parents to assist in answering many of the questions in the visitor center. The NPS provides black and white copies of the booklet, which can be difficult to read. I would recommend printing out the required pages at home an bringing them along. You can determine the required pages, by looking at the top of the page red for easy, white for medium, and blue for difficult.

img_4611

Pre-Prep:

There are a great number of resources available for students to take advantage of prior to visiting Fort McHenry. Their is a great overview of the Bombardment of Baltimore in the Stuff You Missed in History Class podcast. There are also a number of children’s books that focus on Francis Scott Key and the authoring of what would become the National Anthem. Among them are Step into Reading’s Francis Scott Key’s Star-Spangled Banner and Rebecca Jones’ The Biggest (and Best) Flag That Ever Flew, which recounts the story of the flag’s maker Mary Pickersgill. 

Know Before You Go: The majority of the grounds are accessible via paved or brick walkways. There are bathrooms at the visitor center and inside the center barracks in the fort. A gift shop that sells some of the books listed above is located in the visitor center. A number of living history (seasonal) and talks are provided by the park staff, so check the site’s calendar before heading out.

Location: Fort McHenry is located at the tip of Locust Point at 2400 East Fort Avenue, Baltimore, MD 21230. Baltimore Bus #1 is the only public transportation option and stops at the main gate. From there it is about a 100 yard walk to the Visitor Center.

Hours: The Park is open daily, with the exception of Thanksgiving, Christmas and New Year’s Day. Hours are from 9:00 to 5:00 PM.

Admission: Admission to the park is $10 for those 16 years and older. Children 15 and under are free. Purchase of admission allows free entrance to the site for the next seven days. A yearly pass is available for $40 and provides admission for three adults. Educational groups can seek a waiver to the fee.